
← Back to: Mastering the straight stitch, zigzag, and hem
The zigzag stitch is not a “decorative stitch”.
It’s a technical movement: the needle no longer just moves vertically, it moves sideways from left to right.
This movement changes everything.
The technique is learned by sewing.
Download the free workbook to test width, length, and overcasting in real conditions.
How does the zigzag work?
The zigzag combines two movements:
- needle’s sideways movement
- fabric feed
These two parameters are adjustable.
Essential settings
Width
→ amplitude of the left/right movement
The greater the width, the wider the zigzag.
Length
→ feed distance between two perforations
The shorter the length, the tighter the stitch.
The Simple Zigzag
Standard Setting
- Width: 3 or 4
- Length: 2.5
Depending on what you want to achieve and the nature of your project, always test the settings on a scrap fabric before starting your final piece.
Uses
- Slightly stretchy seam
- Simple finish
- Assembling knit fabrics under low stress
Unlike the straight stitch, the zigzag accommodates tension.
A straight stitch on stretchy fabric can break.
The zigzag moves with the fabric.
Uses of the Zigzag
✔️ Sewing stretchy fabric
The zigzag:
- remains elastic
- absorbs tension
- reduces the risk of breakage
This is fundamental for working with knits if you don’t have a serger.
✔️ Attaching elastic
The zigzag is essential for:
- securing elastic
- distributing tension
- maintaining flexibility
✔️ The 3-step zigzag
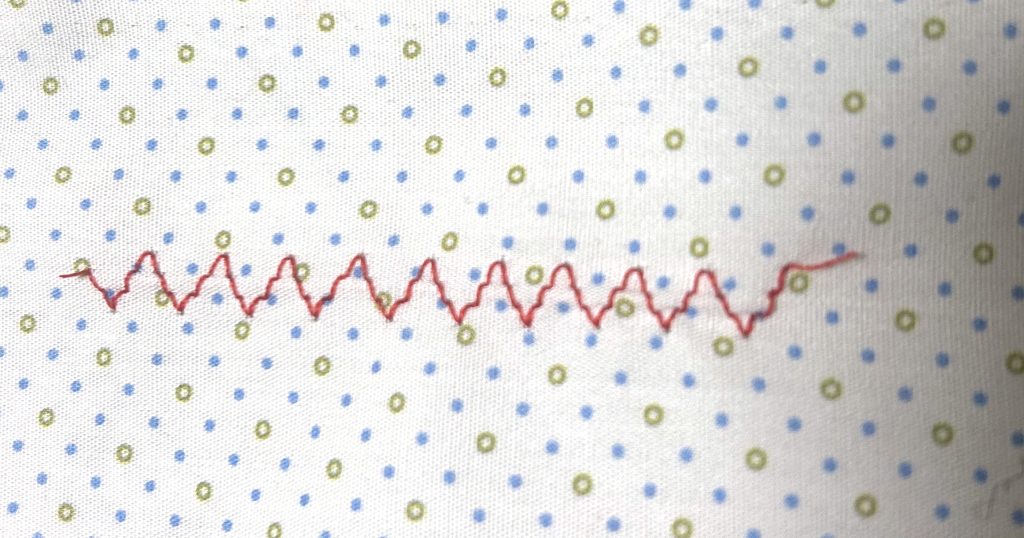
The 3-step zigzag is often used in lingerie.
It combines:
- aesthetics
- stretchability
- durability
The Satin Stitch
The satin stitch is a very tight zigzag.
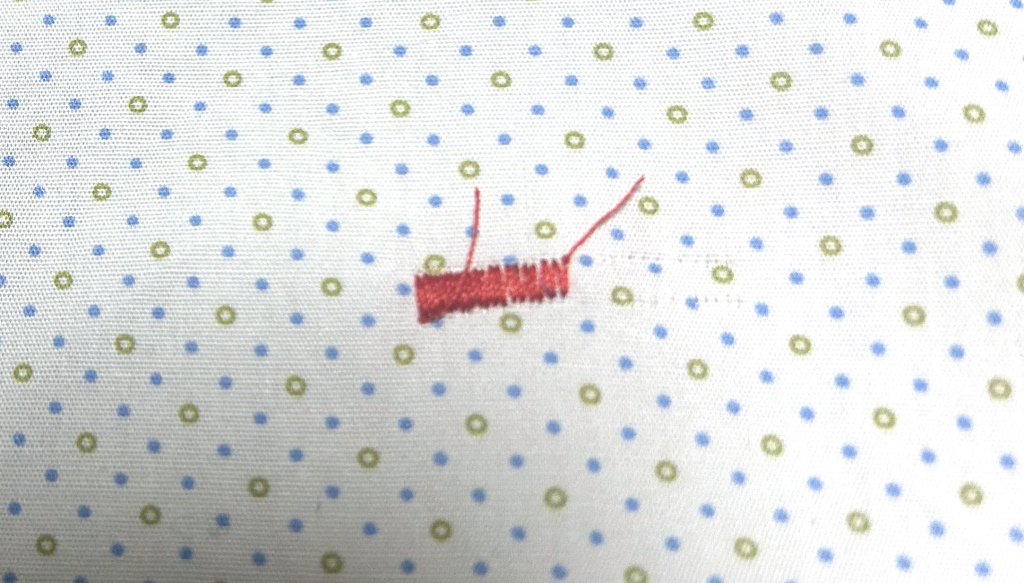
- Width: variable depending on desired effect
- Length: very short
Result:
- Dense stitch
- Almost solid surface
- Reinforcement of a delicate area
It doesn’t unravel.
It’s used to reinforce a sensitive area.
Overcasting a raw edge
Overcast to prevent fabric from fraying.
This allows for:
- a clean finish
- a durable seam
- working without a serger
How to position the zigzag?
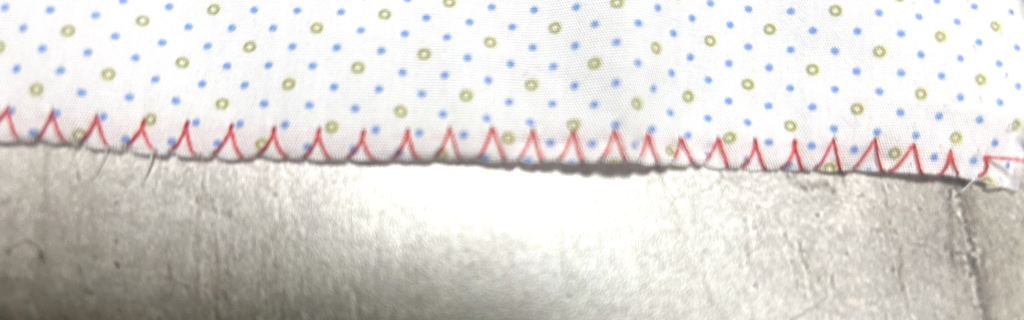
The stitch should:
- Stitch into the fabric
- Slightly extend beyond the edge
- Return
- Enclose the edge
One half of the zigzag is in the fabric.
The other extends slightly beyond.
This movement is what encloses the edge.
Common zigzag stitch problems
and solutions
The zigzag requires precise adjustment.
An imbalance in width / length / tension is immediately visible.
❌ Fabric puckers
Possible causes:
- Length too short
- Tension too high
- Thin fabric not stabilized
Solutions:
- Slightly increase the length
- Decrease tension
- Test on a scrap piece before sewing the final garment
❌ Zigzag doesn’t stretch
Causes:
- Width too narrow
- Length too long
- Excessive tension
Solutions:
- Increase the width (3 to 4 minimum for knits)
- Ensure the fabric can slide freely
- Test by gently pulling the seam
❌ Edge frays despite overcasting
Causes:
- Zigzag entirely within the fabric
- Insufficient width
- Positioned too far from the edge
Solutions:
- Allow one point of the zigzag to extend slightly beyond the fabric
- Slightly increase the width
- Adjust the position under the presser foot
❌ Irregular / wavy seam
Causes:
- Staring at the needle
- Fabric pulled or held back
- Unstable speed
Solutions:
- Look ahead
- Let the machine feed the fabric
- Stabilize speed
❌ Thread breaks
Causes:
- Tension too high
- Zigzag too tight (unintentional satin stitch effect)
- Inappropriate needle
- Poor quality thread
Solutions:
- Check the tension
- Slightly lengthen the stitch
- Match the needle to the fabric (universal / stretch)
Key Takeaways
The zigzag is not a “random” stitch.
You control:
- the width
- the length
- the position relative to the edge
It’s a technical stitch, not decorative.
Mastering the zigzag means:
- being able to sew knits
- attaching elastic
- finishing neatly without a serger

