
← Back: Sewing Machine Anatomy
The needle is the central component of the sewing machine.
It pierces the fabric, carries the upper thread, and allows the stitch to form with the bobbin thread.
A bad needle: skipped stitches, broken thread, damaged fabric, irregular sewing.
Quick Anatomy of a Needle
- Shank (flat side): flat part at the back. It indicates the mounting direction.
- Shaft: long part.
- Eye: small hole where the thread passes through.
- Point: part that penetrates the fabric.
The flat side is almost always oriented toward the back on domestic machines (check your manual).
Different Needles
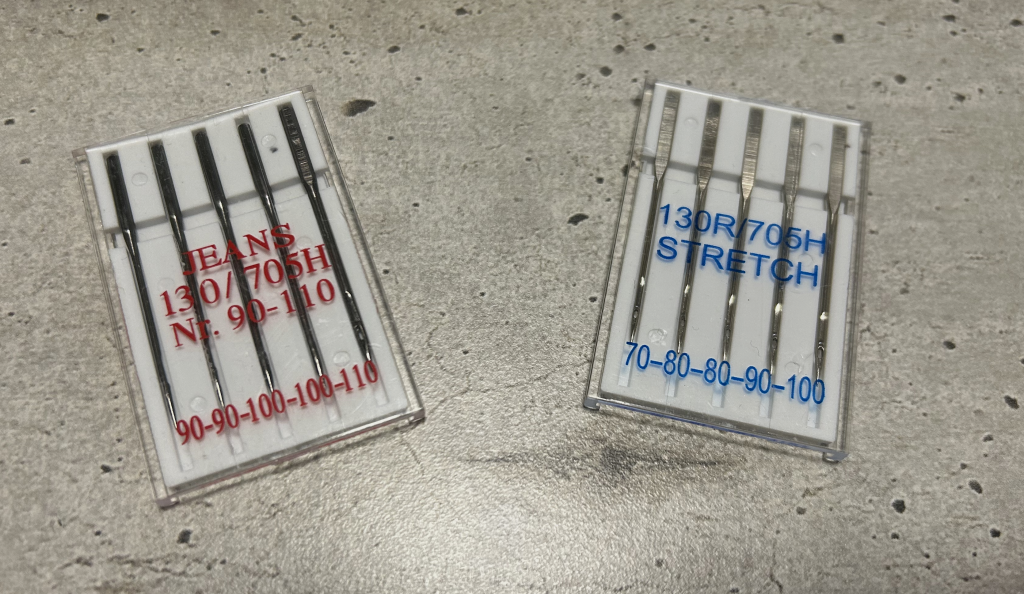
Universal
Use: cotton, poplin, standard fabric.
Slightly rounded point.
This is the “default” needle.
Jersey / Stretch
Use: stretch fabrics.
Ball point.
It separates the fibers instead of cutting them.
Prevents holes and skipped stitches.
Microtex
Use: fine, precise fabrics (voile, satin, clean topstitching).
Very fine and sharp point.
Provides more precise sewing.
Jeans
Use: denim, thick fabrics.
Stronger shaft.
Handles multiple layers.
Needle Sizes
Examples:
70 / 80 / 90 / 100
- 70: fine fabrics
- 80: standard fabrics
- 90: thicker fabrics
- 100: very thick fabrics
Changing Your Needle
Moving the Needle
to Adjust Seam Distance
On many domestic machines, the needle can be moved to the left or right.
When the needle is in the center position, the markings on the throat plate serve as seam allowance guides. The indicated distance corresponds to the gap between the needle and the fabric edge.
But you can fine-tune this setting:
- Measure the distance between the needle (center position) and the inner edge of the presser foot.
- Move the needle laterally.
- Use the edge of the foot as a new fixed reference.
By combining:
- needle position,
- edge of the foot,
- throat plate markings,
you can easily achieve standard seam allowances:
- 5 mm
- 7 mm
- 10 mm
With a precise mark on the foot, it’s possible to achieve very fine intermediate values.
This adjustment is particularly useful for:
- even topstitching,
- sewing close to an edge,
- precise zipper installation,
- technical adjustments.
Moving the needle does not change the width of the straight stitch.
It only changes the position of the seam relative to the fabric edge.
Needles Break
Yes.
And it’s not unusual.
It’s a thin steel part that works at high speed and undergoes repeated stress.
When the stress exceeds its mechanical resistance → it breaks.
Main Causes
1. Needle Unsuited to the Fabric
- Needle too fine for thick fabric.
- Universal needle on very stretchy jersey.
- Wrong size (70 on denim, for example).
The needle bends slightly with each stitch → fatigue → breakage.
2. Sewing Over Bulk
- Seam intersections.
- Jean hem.
- Metal zipper.
- Sewing over a button or hard element.
If the machine forces through without slowing down → impact → breakage.
3. The Needle Hits a Pin
Metal against metal.
The needle descends at full speed.
If it hits a pin:
- it deflects abruptly,
- it breaks cleanly or bends,
- sometimes it breaks a few stitches later.
Simple rule: always remove the pin before the needle passes over it.
If you’re feeling lazy, or just for safety, it’s recommended to pin perpendicular to make it easier for the needle to pass between the pins.
4. Fabric Pulled Backward
When you pull the fabric:
- the needle deforms laterally,
- it hits the throat plate,
- it breaks.
The machine must feed the fabric on its own.
5. Needle Improperly Installed
- Not fully inserted.
- Flat side incorrectly oriented.
- Screw insufficiently tightened.
It vibrates → it breaks.
6. Normal Wear
A needle doesn’t last forever.
Signs of wear:
- unusual noise,
- skipped stitches,
- irregular sewing,
- thread breaking for no reason.
In practice: change the needle every 6 to 8 hours of intensive sewing.
Next lesson →
The Bobbin

